Using Selective Color in Photoshop
Creating Selective Color in Black and White
Let’s start with a step-by-step process highlighting one color in a black and white image. We will use Photoshop selection tools and layer masks.
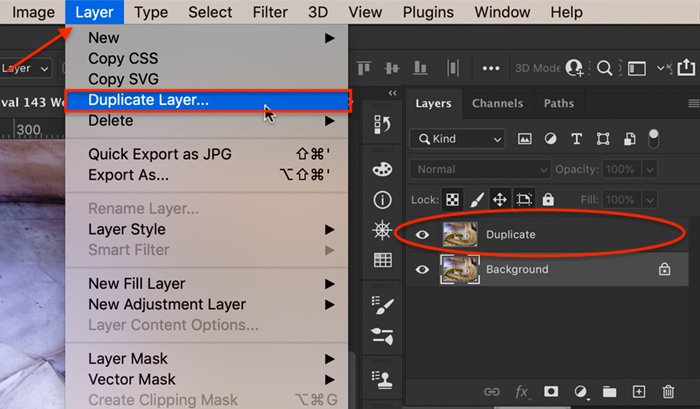
Step 1: Duplicate Background Layer
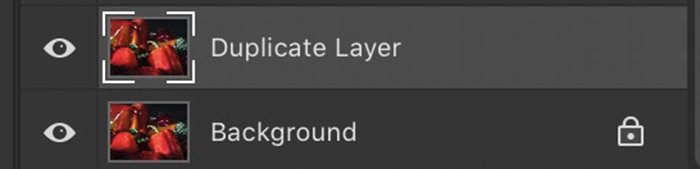
Open an image in Photoshop and duplicate your background layer. To do this, go to the layer drop-down menu and select Layer > Duplicate Layer (Ctrl or ⌘Command J).
Step 2: Select a Color or Object
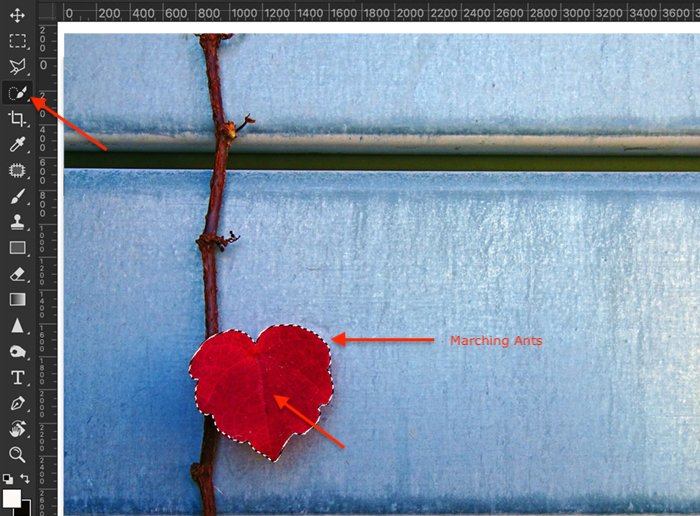
Option 1: Quick Selection Tool
On the copied layer, select a color or a colored object that you want to keep. There are many selection tools you can use in Photoshop. If the color you want to select is distinct against the background, use the Quick Selection tool. Click on the tool. Then click on the color you want to select. You can also click and drag to select a larger area or make the tool bigger by using the right bracket key ( ] ). You should see marching ants around the edges of the colored area to show that it is selected. You can add to the selection by clicking again on an unselected area. The marching ants should expand. To remove some of the selection, first, make the tool smaller. Then press the Option key and click on the area that you want to de-select.
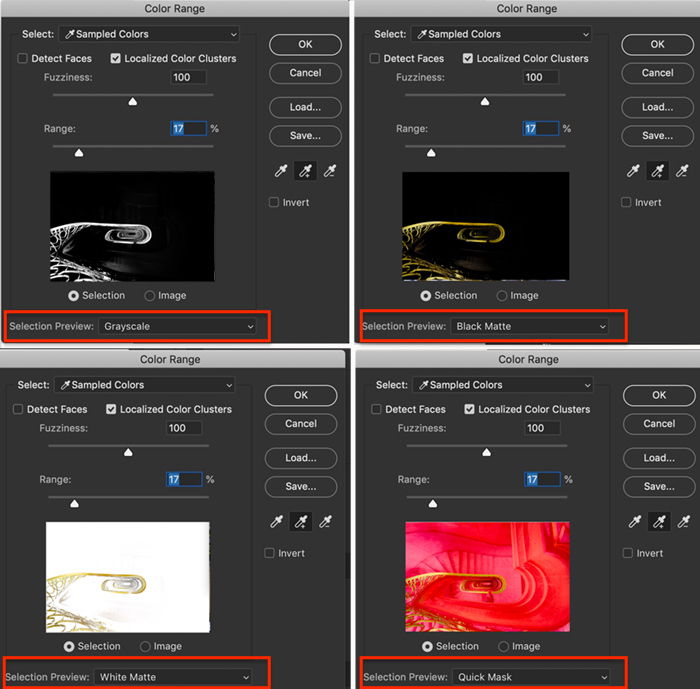
Option 2: Color Range Tool
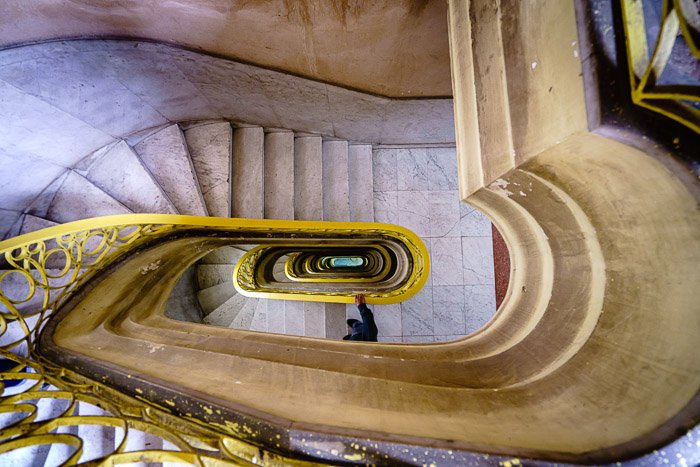
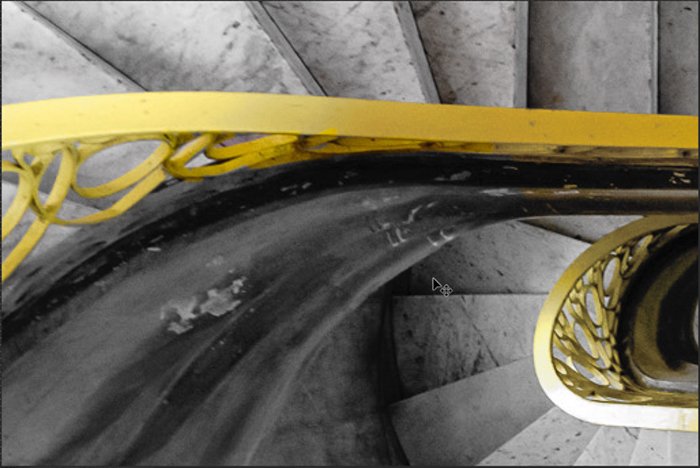
If your color selection is more complicated, use the Color Range tool. For example, highlighting the yellow handrail in the opening image is more difficult. The color is not as distinct against the greys and neutral colors of the stairs. Also, the shape of the handrail includes a lot of twists and turns. It is more difficult to select the color precisely. Go to Photoshop’s drop-down menus at the top and choose Select > Color Range. In the Color Range window, Sampled Colors is the default. Use the eyedropper to click on the color you want to keep. You can add to the selection by holding the Shift key and clicking on another shade. To remove colors from the selection, hold the Option key while clicking. When the Localized Color Clusters box is unchecked, Photoshop looks across the entire image for the color you clicked. Checking the box tells Photoshop to look for the selected hue only around the area you have clicked. The Fuzziness slider tells Photoshop how precise you want the color selection to be. Lowering the Fuzziness by moving the slider to the left only selects hues close to the ones chosen. If you want to include more colors like the one you clicked, raise the Fuzziness number by moving the slider to the right. The Range slider tells Photoshop how close you want the selected colors to be to the chosen area. The selection preview box lets you see the selected area. Change the selection preview to Greyscale, Black Matte, White Matte, or Quick Mask, whichever helps you see the selected areas. When you’re satisfied with your selection, click OK.
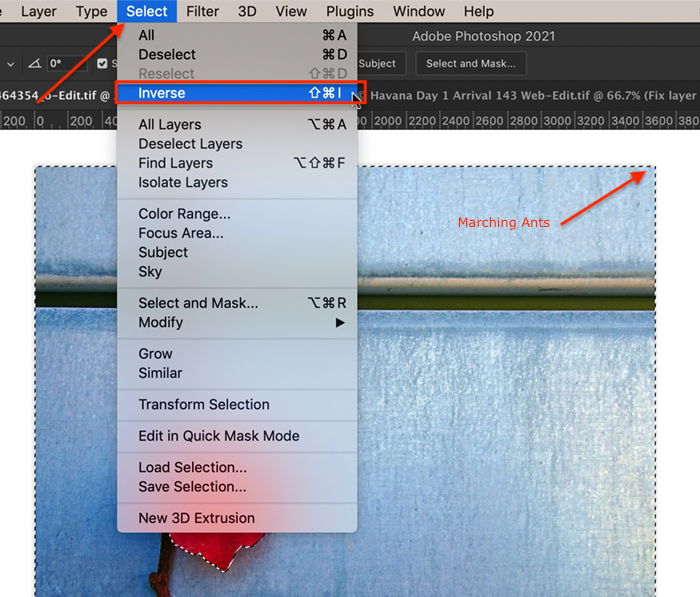
Step 3: Invert the Selection
In Step 2, you selected the pixels that you do not want to change. So, invert the selection. To do this, go to Photoshop’s drop-down menus at the top and choose Select > Inverse (Shift+Ctrl or ⌘Command I). The pixels you want to change are now selected. The marching ants should appear around the edges of your picture.
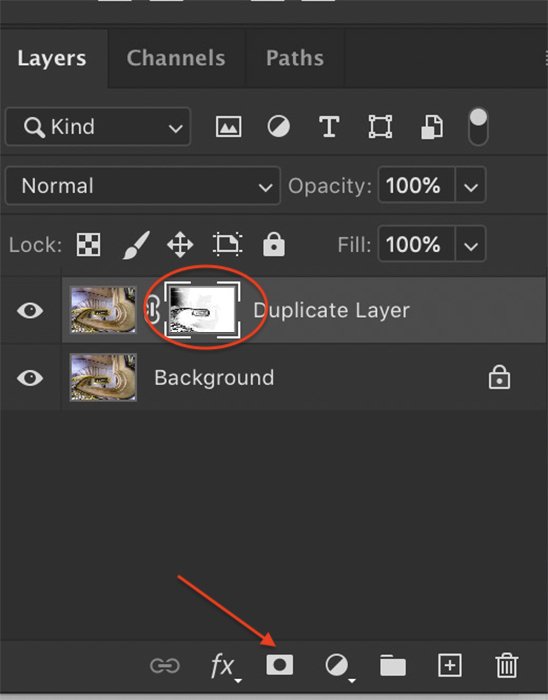
Step 4: Create a Mask on Duplicate Layer
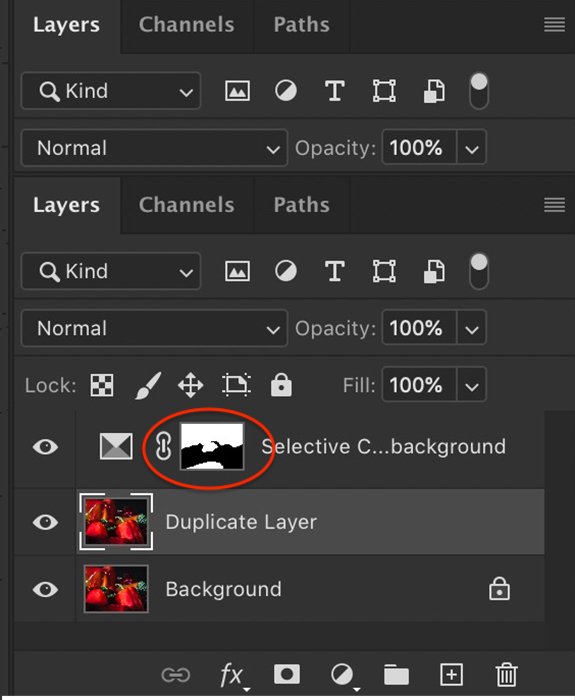
Click the ‘Add a mask’ icon below the layers panel (a white rectangle with a grey circle). Your image does not change, but a mask appears next to the duplicate layer. Most of the mask is white. The area of color that you initially selected is black.
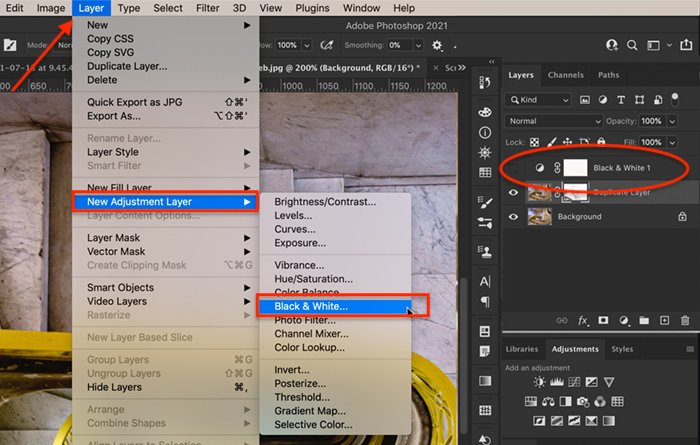
Step 5: Convert Image to Black and White
Use an adjustment layer to convert your image to black and white. To do this, go to Photoshop’s drop-down menu at the top and select Layer > New Adjustment Layer > Black & White. Or you can click on the ‘Create new fill or adjustment layer’ icon under the layers panel and choose Black & White. Your entire image will become black and white, and a new layer appears labelled Black & White.
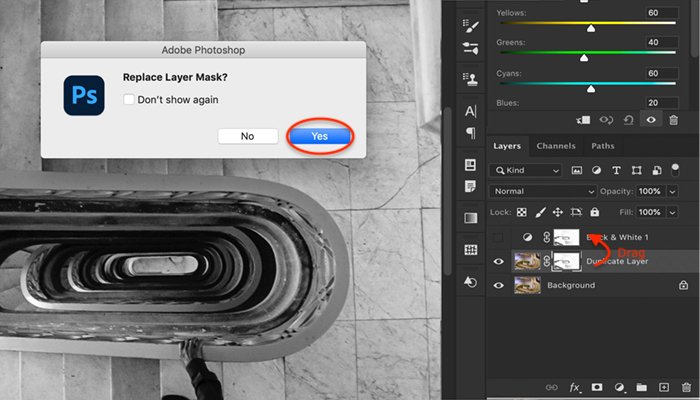
Step 6: Move Step 4 Layer Mask to Black & White Layer
Click on the layer mask created in Step 4. Click only on the mask and not on the entire layer. Drag the mask onto the Black & White layer created in Step 5. You will get a message that asks if you want to replace the layer mask. Click Yes.
Step 7: Fine-Tune the Layer Mask
Once you convert your image to black and white, you may see areas of color where you do not want. Select the layer mask next to the Black & White layer. Then use a white paintbrush to erase color from your image. White reveals the Black & White layer. If you want more color, switch the brush to black (hotkey, X). Black hides the Black & White layer.
Step 8: Adjust the Black & White Layer
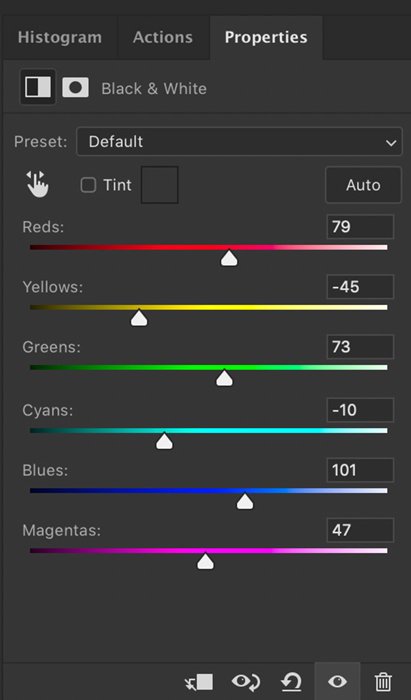
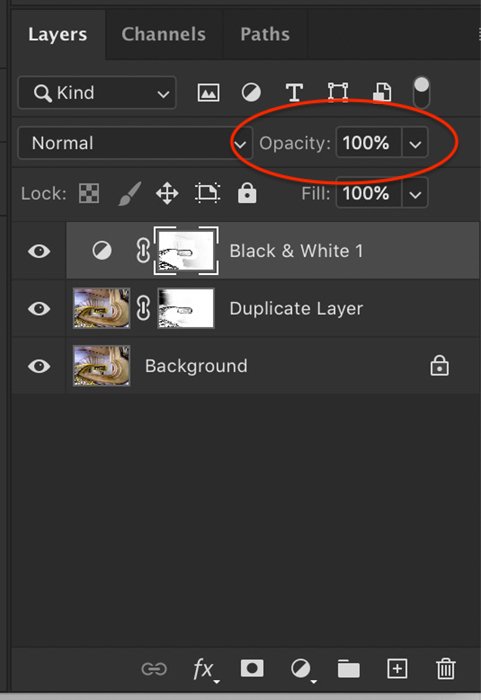
Double-click on the Black & White layer icon to open the properties panel. You can use the sliders to lighten or darken various shades. There is no right or wrong setting. Move each color slider until you like the look of your image. You can also bring back a hint of color into the black and white by lowering the opacity of the Black & White adjustment layer. This mutes the background colors, but your image is no longer fully monochromatic.
Using Photoshop’s Selective Color Tool
As we’ve seen, selective color is the term we use when highlighting a color in a black and white image. It can be a bit confusing then to find that Photoshop has a Selective Color tool that does something a bit different. This tool allows you to alter the colors in your image. Portrait photographers can use a Selective Color adjustment to get rid of color casts on skin tones or to remove redness in the skin. But you have a lot of artistic flexibility in altering the colors in your image. Let’s explore Photoshop’s Selective Color tool.
Step 1: Duplicate the Background Layer
Open an image in Photoshop and duplicate your background layer. To do this, go to Photoshop’s drop-down menu at the top and select Layer > Duplicate Layer (Ctrl or ⌘Command J). Duplicating your background layer ensures that you can always go back to the original image.
Step 2: Add a Selective Color Adjustment Layer
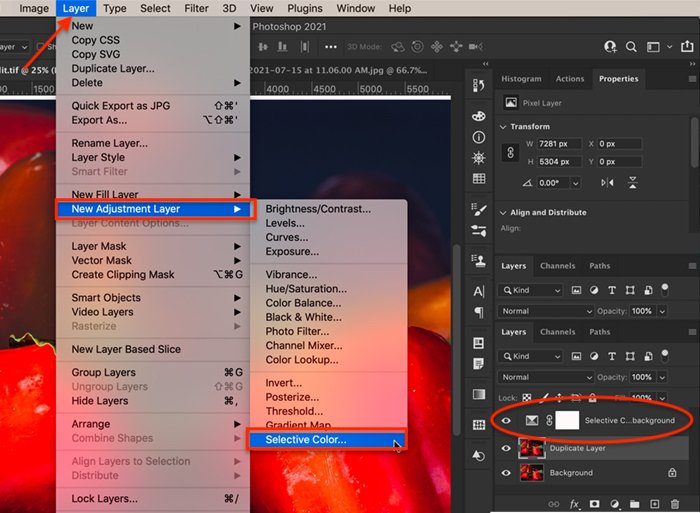
To add a Selective Color adjustment, go to the drop-down menus at the top and select Layer > New Adjustment Layer > Selective Color. Or you can click on the ‘Create new fill or adjustment layer’ icon under the layers panel and choose Selective Color. A new layer appears above your duplicate layer.
Step 3: Adjust Individual Colors
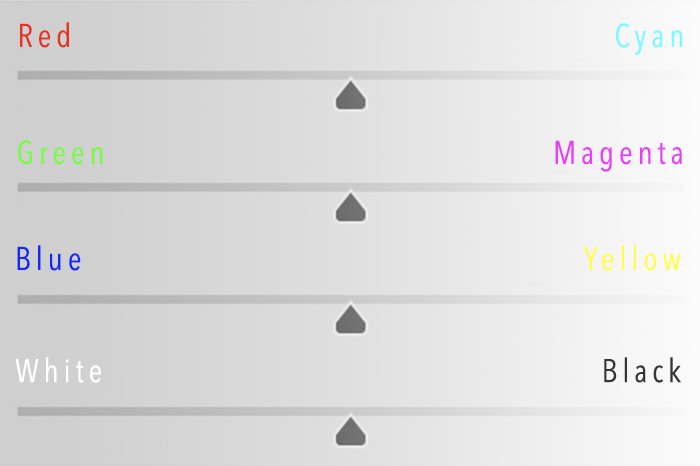
Double click on the adjustment layer to open the properties panel. Select the color you want to change. You can selectively change the Reds, Yellows, Greens, Cyans, Blues, and Magentas in your image. You can also tone Whites (highlights), Neutrals (midtones), and Blacks (shadows). Toning these is like using the color grading option in Lightroom. With each color or tone, you can move the sliders to include more or less Cyan, Magenta, Yellow, or Black. The sliders work with opposite colors. But this is not very obvious from the Selective Color panel in Photoshop. For example, the Cyan slider should really have Cyan on one end and Red on the other (as shown in the mock-up image below). To add more red, move the Cyan slider to the left. To tone down Reds, move the Cyan slider to the right. With four sliders for each color, you have many choices for adjusting the tone in your image.
Step 4: Use a Mask to Limit Color Changes
Use the layer mask next to the Selective Color adjustments to define where you want color changes applied. For instance, you can highlight one flower out of many. Choose the paintbrush tool. Paint on the layer mask. White areas will show the change. Black areas will not be affected.
Conclusion
Take control of color in Photoshop. With selective color, you get to decide which colors pop and how they combine. You do not have to settle for either black and white or color. You can have both! Selective color lets you do something creative with your images. Or you can gently adjust unflattering color casts in a portrait. In Adobe Photoshop, selective color can refer to two different photographic effects. Selective color can mean highlighting one color by making the rest of your image monochromatic. Select and mask everything except the color you want to keep. Then add a black and white adjustment layer with the mask. Everything in the photo becomes monochrome except the masked color. It can also mean using the Selective Color tool in Photoshop. It lets you adjust the tint of individual colors. With this tool, you have a lot of flexibility to change the look and feel of your image. Are you looking for simple ways to edit your photos in Lightroom quickly and beautifully? Our Effortless Editing with Lightroom course may be perfect for you!