[ExpertPhotography is supported by readers. Product links on ExpertPhotography are referral links. If you use one of these and buy something, we make a little bit of money. Need more info? See how it all works here.]
Pet Photography Lighting Setup with Soft Box Light
Using: Westcott Octagonal Soft Box You can use any shape soft box for the arrangements mentioned below. My preferences have always been mid-sized octagonal or rectangular lights, but soft boxes come in all shapes and sizes.
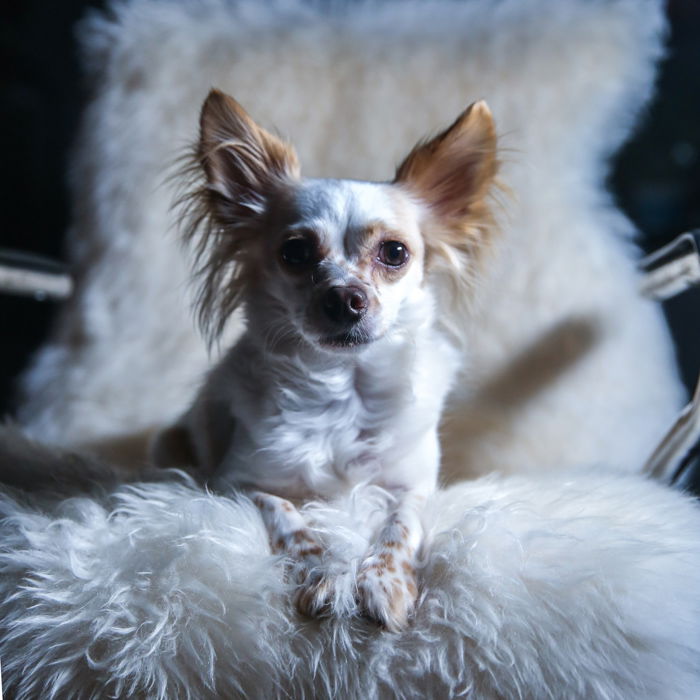
Overhead
Quite a few octagonal soft boxes come with an adjustable head that allows you to tilt the light downwards. Pair that with a tall tripod and you have the overhead lighting arrangement. This look doesn’t work for all types of animals though. It really does depend on their facial structure. However, this look creates a very dynamic, dramatic, and expressive image. You can use this lighting position for any colored animal as it creates a lovely rim that will separate your subject from the background. Try to play around with different heights, as the distance from your subject will affect the intensity.
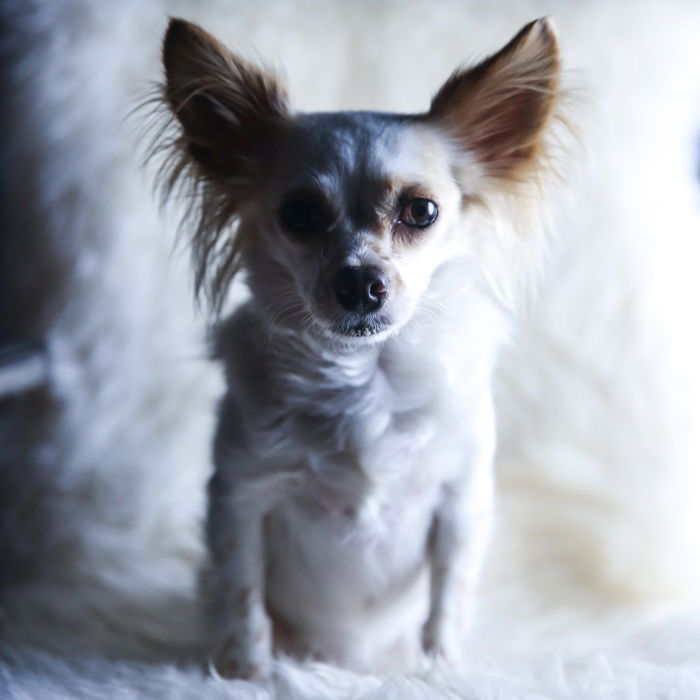
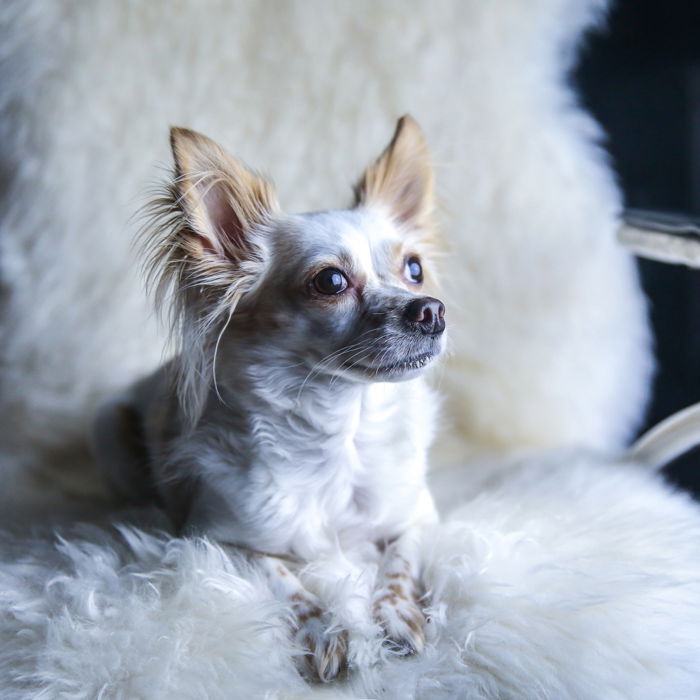
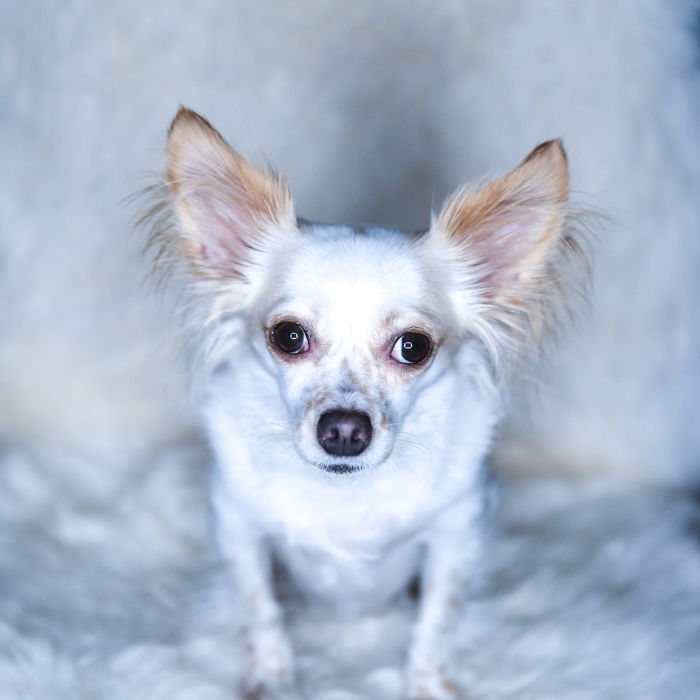
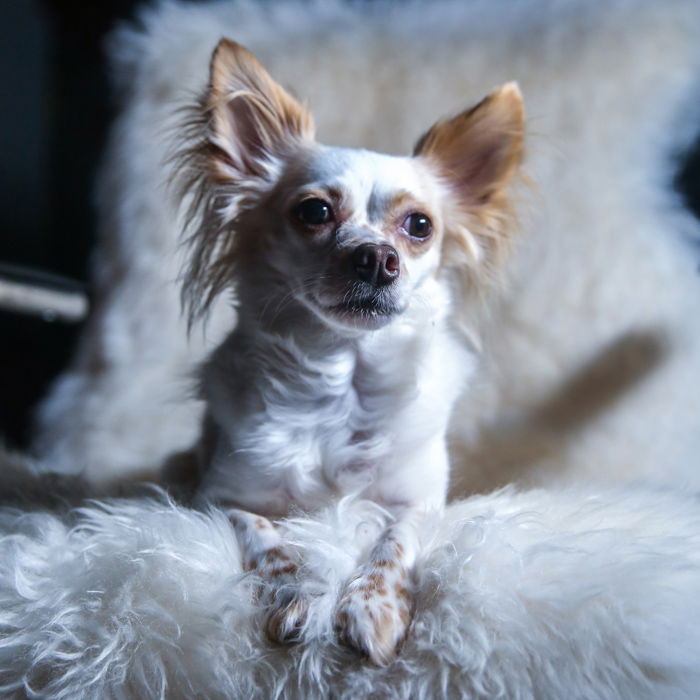
In Front
This is the most standard pet portrait lighting arrangement. Front lighting is the one light set up almost everyone goes to immediately. Although it can be very flattering when done right, there are several things to keep in mind about front lighting:
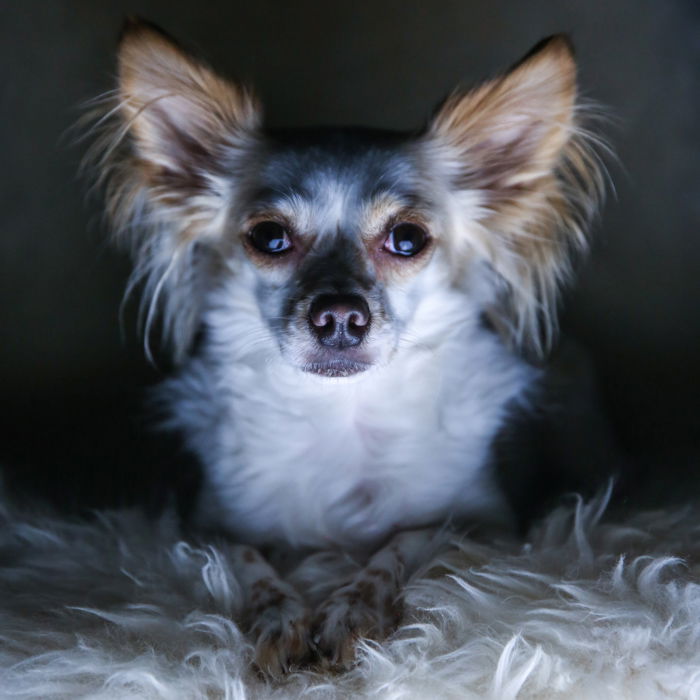
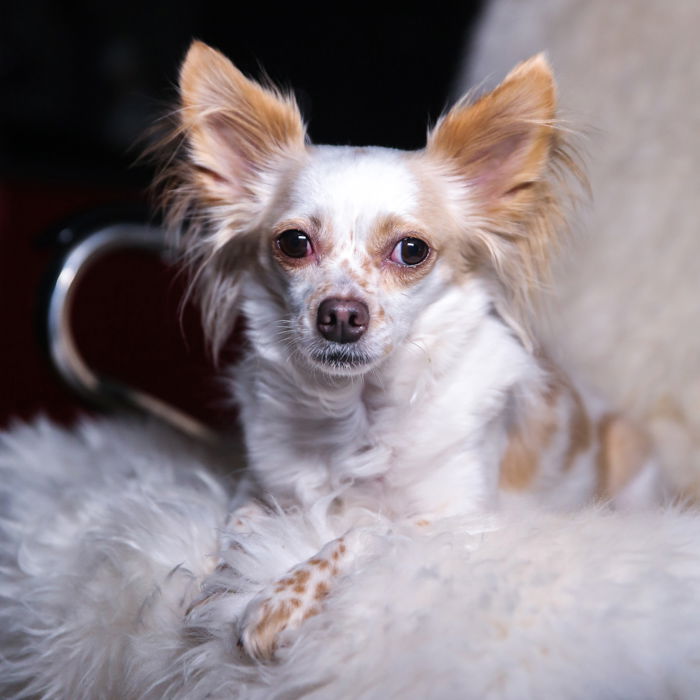
Below
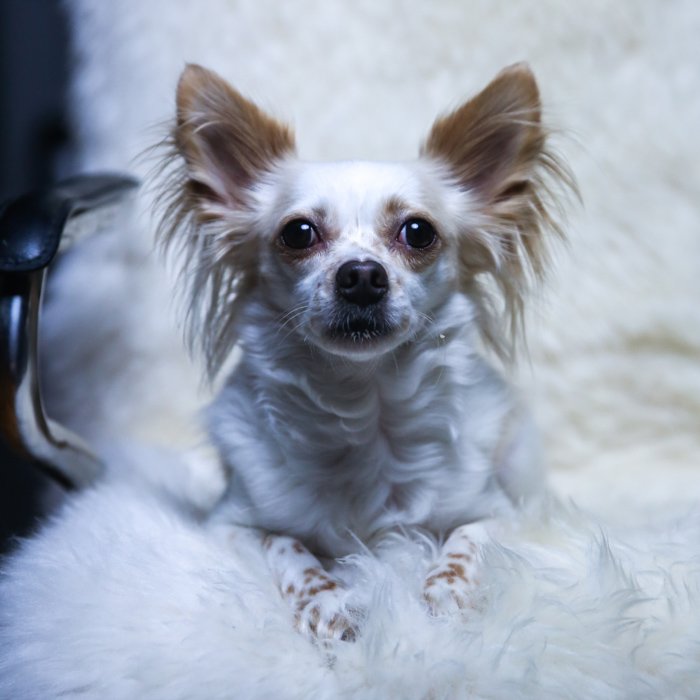
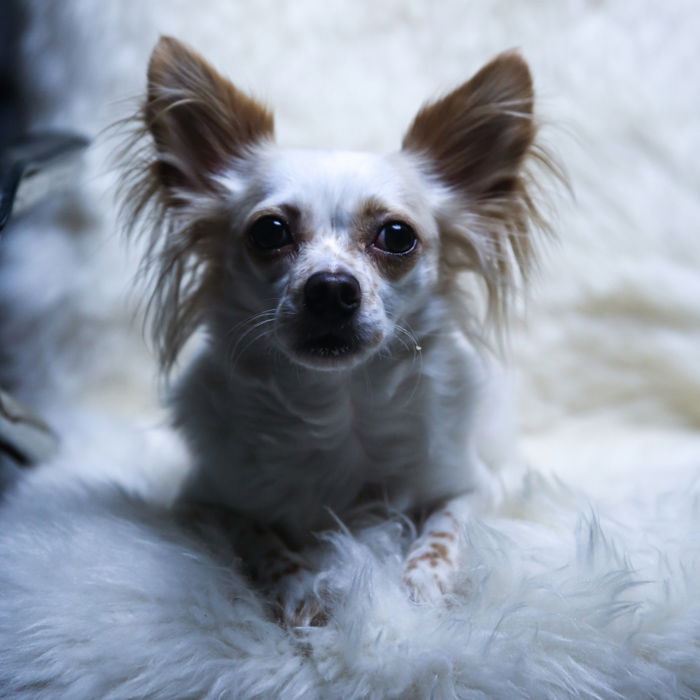
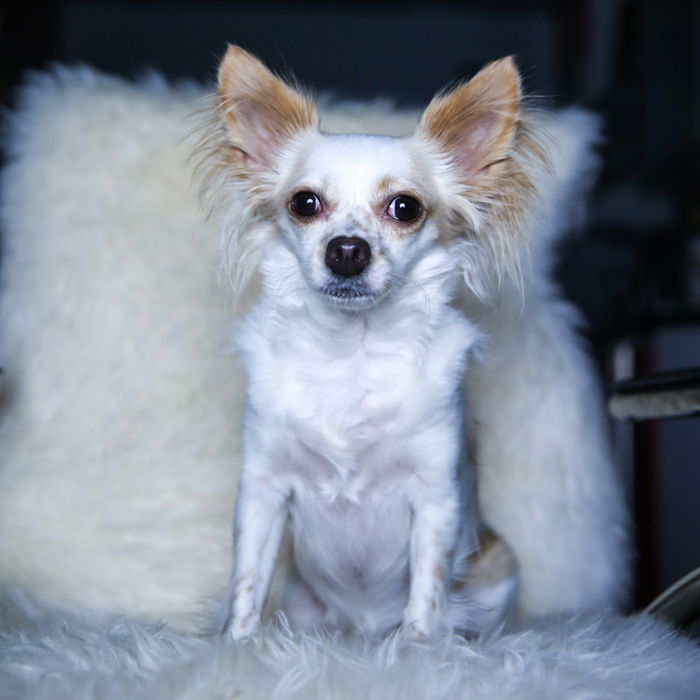
This can be a tricky setup. It depends on the height of your tripod and the size of the pet. My dog is quite small so I have to get her up on something in order to achieve the “from below” lighting effect. This one light arrangement produces a very ominous and cabin-in-the-woods feel to the shots. Animals with long hair or fur look especially dramatic when the light comes from below. Try to position your light from below centered with the pet’s body and head. Otherwise, the subject will not be lit properly and will lose his or her shape. Likely the best-known setup for dramatic portraits. This one light look is very famous for both human and animal portraits alike. Depending on the direction the pet is facing, the look can differ immensely. All you have to do is set up the light directly to the side of your subject at approximately their eye level. The rest changes depending on what direction your model looks at. If the model is looking at the light directly, the rim of their face will be lit with the rest disappearing into the dark. If the subject is staring at you rather than the light, then one side of their face will be dark while the other will be bright. This creates the classic dramatic portrait. If the subject is looking away from the light, the look may be a bit more difficult to achieve as it’ll depend on how powerful your camera’s sensor is. Shoot in RAW, and bring out some of the details in the darkness via post processing.
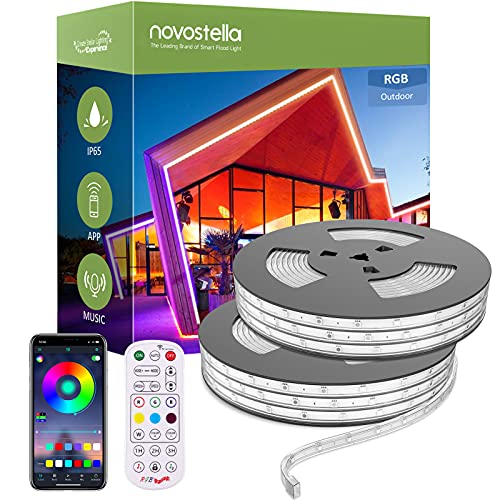
LED Strip
Using: The Spiffy Gear Spekular Modular LED Kit You can use any type of LED light for these arrangements, but the specific ones that I am utilizing are bars. These bars can be arranged in a variety of shapes, but I kept them as bars for the purpose of this article (excluding the ring light section).
In Front
The go to for most photographers is to set up lights in front of their subject. This always seems like the obvious choice! For the most part, it is. However, you have to remember the LED lights are very bright and tend to not have a diffuser. Depending on the brand you are using, the lights can run rather warm as well. The best way to set up the in-front lighting arrangement is to place your LED light a good distance away from your subject. The further back you go, the softer the light will become. It’ll be significantly less like a harsh spotlight. Do remember that your body can block the light, so try to position yourself a bit below the light or above it! Keep in mind that light colored pets will have a bit of a harder time being photographed by the lights because it can cause lots of blown out highlights. Try to underexpose by a few notches.
Off to the Side
A drama-filled and storytelling arrangement, setting the light off to the side is an excellent one light pet photography trick. Many pet owners love these moody portraits of their canines, felines, and horses. Do remember that because LEDs do not have a diffuser, you will need to position your light a bit further away to avoid an overly harsh set up.
Ring Light
Ring lights are a very special kind of one light arrangement. They can come as a solid light, but for the purpose of this tutorial, I have arranged my Spekular kit to mimic the effect of a ring light. Ring lights expose every part of the subject while still separating them from the background. The subject’s eyes will have a ring catch light, which has been made immensely popular in recent times. Though ring lights are used on human portraits most often, they’ve began rising in popularity for animal photography. There are two key ways you can set up ring lights:
In Front
Place the ring light directly in front of your subject and shoot through the light’s center. The subject’s head should be nicely centered with the empty space in the middle of the ring light. How the eyes show the catch light will depend on the distance of the ring light from the eyes. Do keep in mind that ring lights are very bright and can be harsh and uncomfortable for some animals, so ensure that their comfort is top priority.
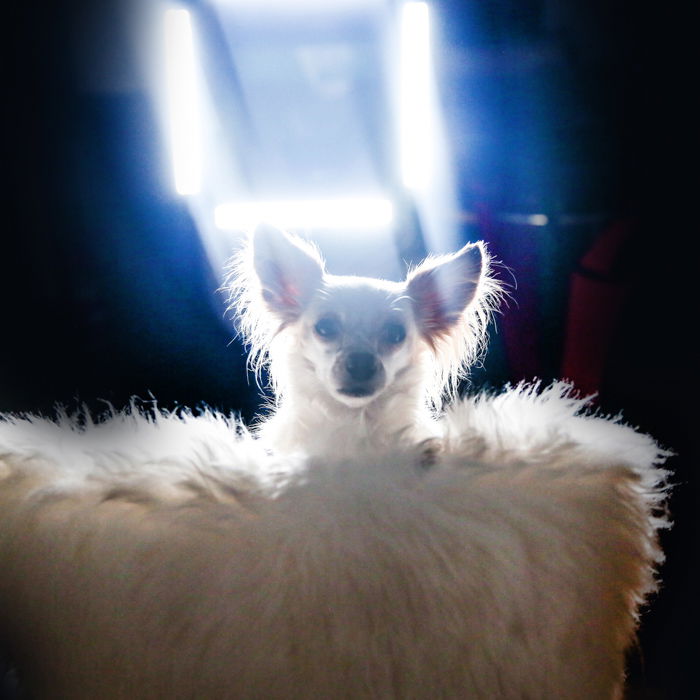
In the Back
A very fun arrangement is placing the ring light behind the subject. This creates a wonderful halo or ethereal effect when done properly. Although this does work best on long furred animals that are of a decent size, experiment on all kinds! Essentially, you want the animal’s head to be centered with the empty space of the ring light, much like in the front lighting arrangement. The benefit of this set up is that you don’t have to worry about the sensitivity of the pet’s eyes. However, some LEDs can run a temperature so do ensure the light isn’t set up too close to your furry friend.
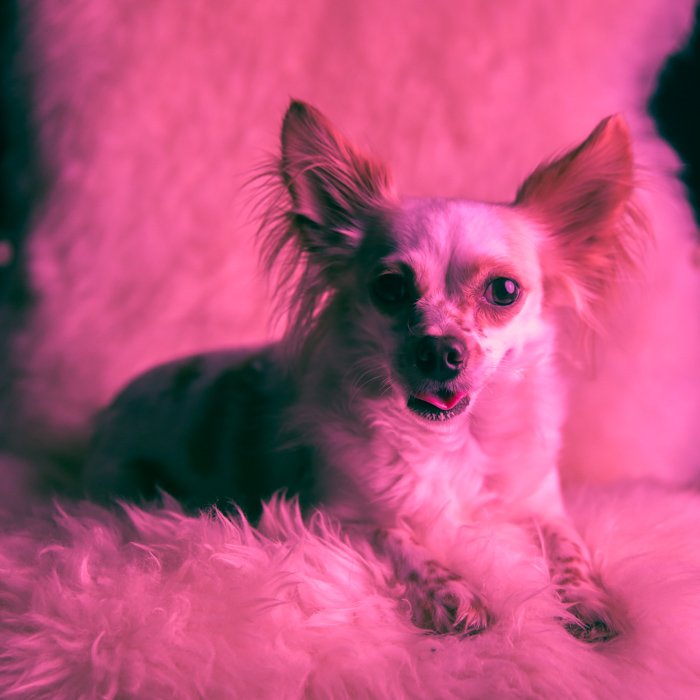
Gel Light
You can make your one light set up more interesting by adding gels! Gels are filters that go on your light in order to change the output color. Gels are usually sold at photography stores and clamped on to lights.< However, you can also make your own gel using cellophane and tape. Just take some very saturated cellophane from a local party or art store and wrap them around your softbox or LED light (so long as the LED runs cold and won’t melt the plastic paper) and fasten with tape.
Portable Light
You don’t always need studio lights for very cool one light pet portraits. Any light you have available will do the trick! When keeping my kit small and candid, I love the small Chromo portable lights you can buy online for $20. They burn cold so there is no risk of the animal getting hurt, and can be powerful little tools. You can tape or mount these lights almost anywhere. A lot of the portable lights come with either tripod mounts, hot shoe mounts, or magnetic mounts (sometimes a combination of all three). With these creative pet portrait lighting ideas in mind, go out, and experiment! For some more great tips, check out our handy pet photography cheat sheet.